If you’ve ever experienced unexpected redness, stinging, or breakouts after trying a new skincare product, you’re not alone. Sensitive skin can react quickly to certain ingredients, making it crucial to take precautions. One of the most important (and often skipped) steps before introducing a new product is performing a patch test.
In this blog, we’ll walk you through everything you need to know about how to perform a patch test for sensitive skin—why it matters, how to do it properly, and what signs to watch for.
What Is a Patch Test?
A patch test is a simple process where you apply a small amount of a new skincare product to a discreet area of your skin and observe it over time. This test helps you check for allergic reactions, irritation, or sensitivity before applying the product to your entire face or body.
For sensitive skin types, patch testing is essential to avoid inflammation, itching, rashes, or worse.
Why Is Patch Testing Important for Sensitive Skin?
Sensitive skin is more reactive to certain ingredients found in common skincare products. Even items labeled “gentle” or “hypoallergenic” can trigger reactions. A patch test helps you:
- Avoid full-face flare-ups
- Identify irritants before they cause damage
- Save money and discomfort
- Protect your skin barrier
Whether it’s a serum, moisturizer, cleanser, or sunscreen—every new product should be tested first, especially if you have conditions like eczema, rosacea, or allergic dermatitis.
When Should You Perform a Patch Test?
Perform a patch test when:
- You’re using a new product for the first time
- Trying a product with active ingredients like retinol, AHAs, BHAs, or vitamin C
- Switching to a new brand
- Introducing natural or essential oil-based skincare
- Reacting to a product and unsure which ingredient is to blame
Even “clean” or organic products can cause irritation. Natural doesn’t always mean non-reactive.
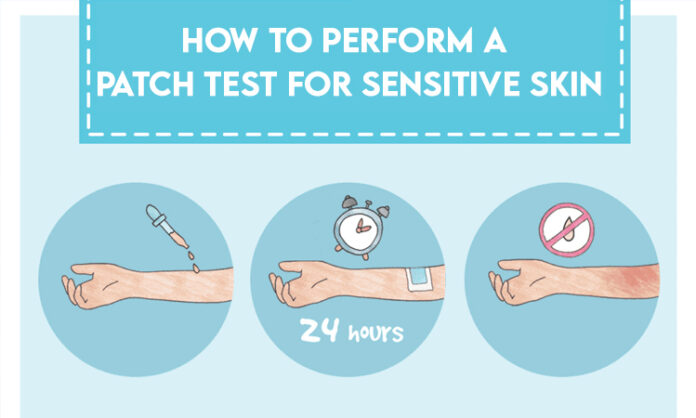
How to Perform a Patch Test: Step-by-Step
Here’s a foolproof guide to testing skincare on sensitive skin.
Step 1: Choose the Right Area
Pick a discreet yet sensitive area for testing. The best spots are:
- Inner forearm
- Behind the ear
- Side of the neck
- Jawline (for facial products)
These areas mimic your face’s sensitivity but can be easily hidden in case of a reaction.
Step 2: Clean the Area
Use a gentle, fragrance-free cleanser and pat the area dry. Make sure there’s no lotion, makeup, or sweat that could interfere with the product’s absorption or mask a reaction.
Step 3: Apply a Small Amount
Take a pea-sized amount of the product and apply it to the test area. Don’t rub it in harshly—just spread it like you would on your face.
If the product is something that needs to be washed off (like a cleanser or mask), follow the same timing instructions as you would normally.
Step 4: Wait and Observe
Leave the product on and observe your skin’s reaction over the next 24 to 48 hours. Reactions don’t always happen immediately.
You may test longer (up to 72 hours) if you have very reactive skin or a history of allergic reactions.
Step 5: Watch for These Signs
During the test window, check for:
- Redness
- Itching or burning
- Swelling or raised bumps
- Dry patches or peeling
- Stinging or tightness
Any of these symptoms suggest that the product isn’t suitable for your sensitive skin.
Step 6: No Reaction? You’re Good to Go
If the area remains clear—no itching, redness, or discomfort—you can safely try the product on your face. Still, start with small amounts and watch your skin closely during the first few uses.
What If You Do Have a Reaction?
If your skin reacts during the test:
- Gently wash the area with cool water
- Apply a soothing moisturizer or aloe vera gel
- Avoid scratching the area
- If irritation persists or worsens, consult a dermatologist
Don’t try to “push through” a reaction. Continuing to use a product that irritates your skin can worsen sensitivity and lead to long-term issues like barrier damage or hyperpigmentation.
Tips for Safer Patch Testing
- Test one product at a time: This makes it easier to pinpoint the cause of any reaction.
- Avoid testing during flare-ups: When your skin is already reactive, it’s not the right time to introduce new products.
- Record your results: Keep a skincare journal to note which products and ingredients your skin likes—or hates.
- Be cautious with actives: Ingredients like glycolic acid, retinol, and benzoyl peroxide can be more irritating. Always patch test them longer.
- Re-test periodically: Your skin’s tolerance may change over time due to hormones, weather, or stress.
Ingredients to Watch Out for in Patch Testing
Some common irritants in skincare include:
- Fragrances (natural or synthetic)
- Essential oils (like lavender, citrus, or peppermint)
- Alcohol (especially denatured)
- Harsh preservatives
- Dyes or colorants
- Certain plant extracts (like tea tree oil)
On the flip side, soothing ingredients that are generally safe for sensitive skin include:
- Aloe vera
- Colloidal oatmeal
- Centella Asiatica (Cica)
- Panthenol
- Ceramides
- Glycerin
Final Thoughts
Your skin is unique, especially if it’s sensitive. A patch test takes only a few minutes but can save you days or even weeks of irritation. It’s one of the easiest and smartest ways to protect your skin’s health.
So before you dive into that new trending serum or cream, hit pause, do the test, and listen to your skin. Trust us—your face will thank you.
